Once my contractors and I had established an initial scope of work, we then ordered or otherwise salvaged parts that would be used in the renovation process. It was important for me to help establish a sequence for completing the scope of work. So I provided the following list, in order of importance:
- Chassis
- Welding
- Floor Rot
- Prime & Paint
- Sandblasting
- Deadbolt Lock Install
- Electrical
- Install new converter / fuse box
- Galley sink light & exterior lights
- Propane System
- Certify & install tanks
- Run lines
- Working stove & refrigerator
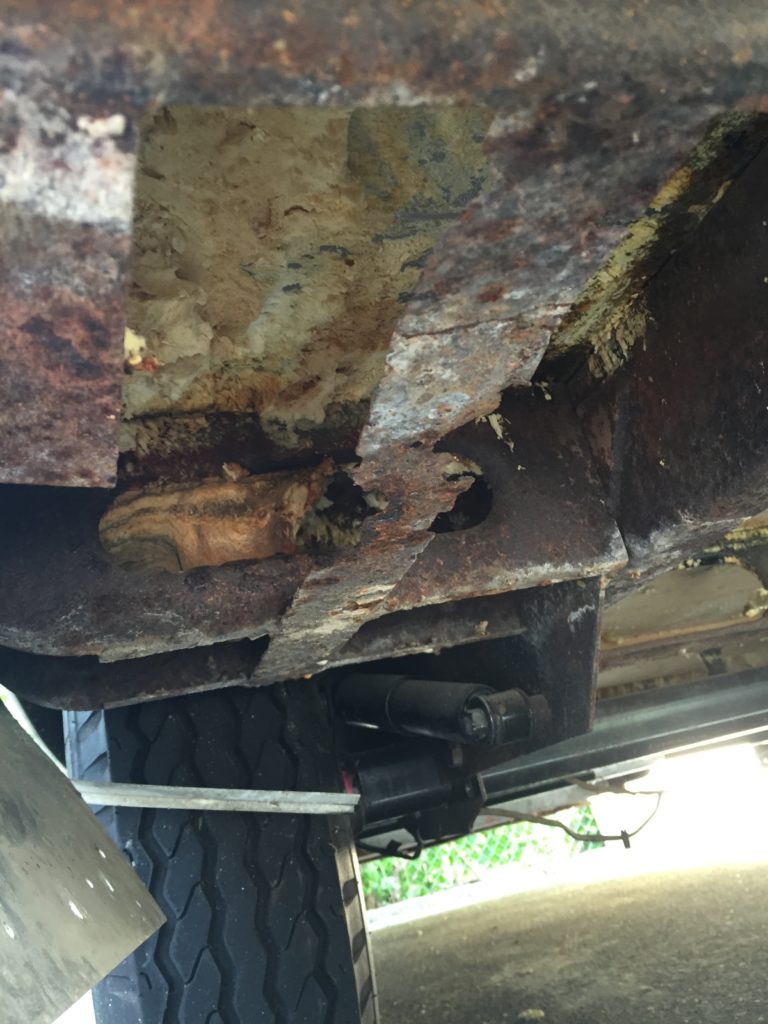
Some of the items on the list, notably the chassis repair and installation of the propane system, were not a part of my original budget. In construction terms, these would constitute change orders. Change orders occur when work is unexpectedly added to the scope after the work has already begun and a budget has been approved. In this case, two factors were at play: First, that chassis repairs were needed once revealed by the unexpected opening of the trailer’s belly pan. The structural / safety factor was a very compelling reason to complete the repair. And second, that this new contractor was offering the work at a more reasonable price than his competitors.
One of the things I asked Éamon McMahon (one of my new contractors) to look at was the stair to the entry door. When opened, the right side of the stair would not engage with the frame, making it wobbly and a little unsafe to stand on. I was told by restorer Colin Hyde during my visit to his shop that this had to do with a rusted outrigger near the stair that helped support it. I sent Éamon this video of the problem:
So, one of the first things that he repaired was this stair. With a couple of new outriggers in place, and after a few minor adjustments, this was the result he sent back to me:
I was very grateful to have a properly working stair again! Sometimes it’s a small adjustment that makes a significant difference in your everyday experience.
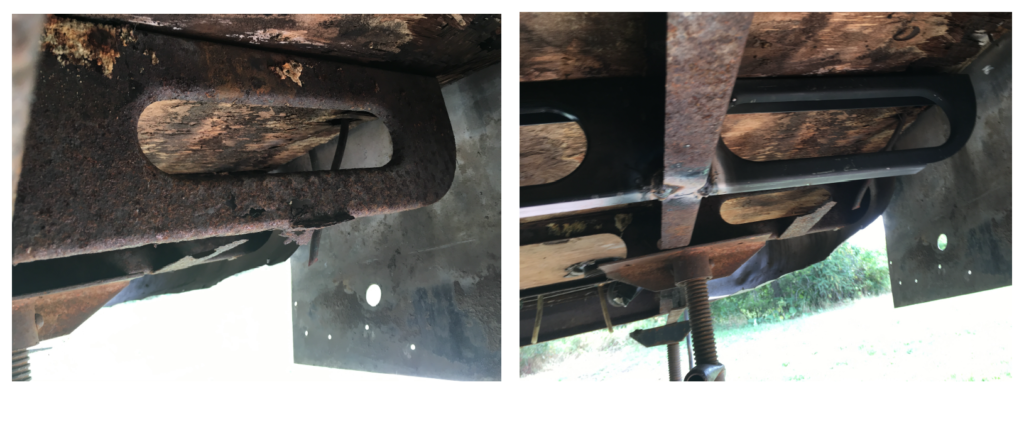
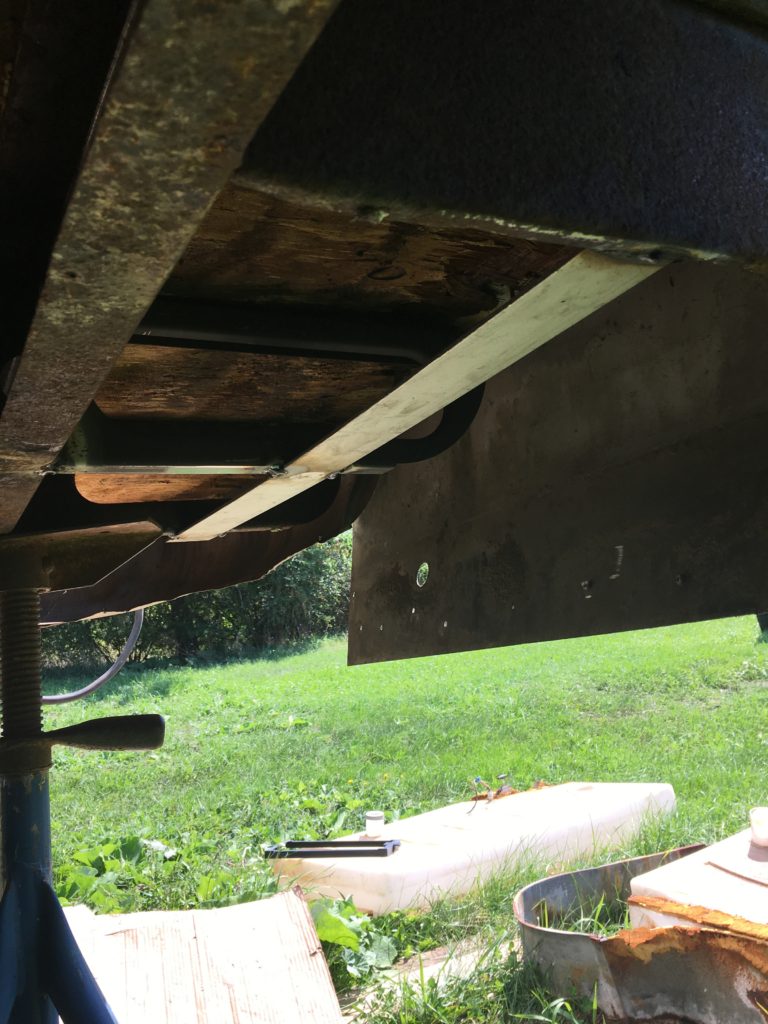
The outrigger work was fairly straightforward for Éamon, just a bit time consuming. All in all, five outriggers were replaced:

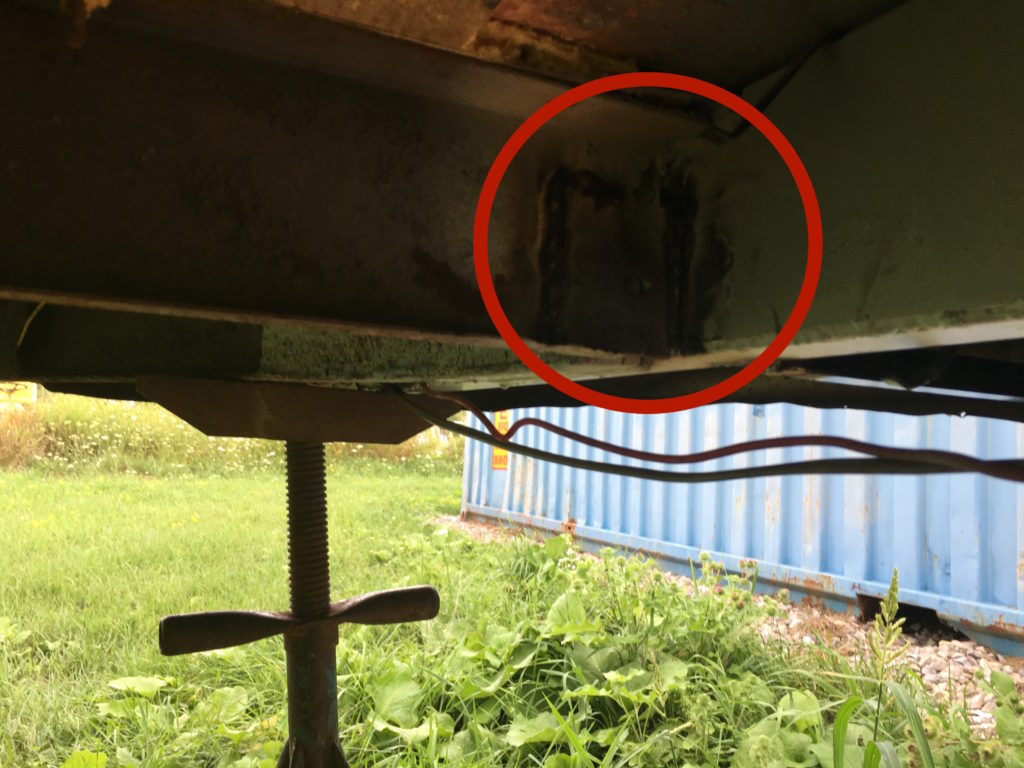
There were also some welds that needed to be done to connect the chassis’ framing members properly:
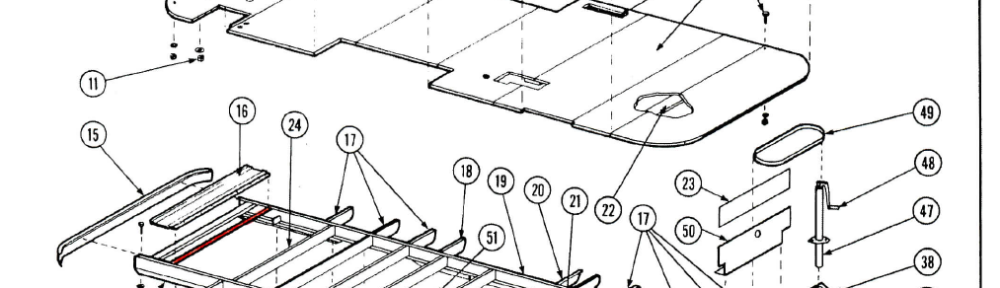
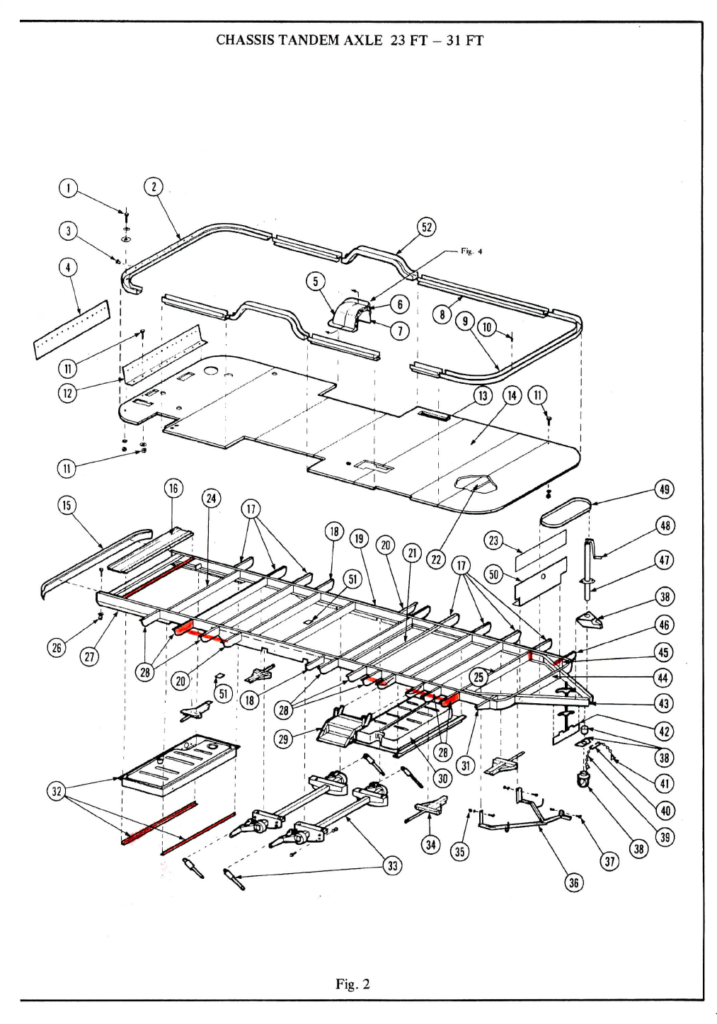
Long, thin strips of steel run the length of the trailer on each side. These were not pictured in the exploded diagram of the trailer chassis that came with the mechanic’s service manual (see top of page). The strips were used as a surface to fasten the belly pan to, and run close to where the panels on the sides of the trailer are wrapped and riveted under the belly. In part because the material used to make them was so thin, most of them were nearly rusted away:
We replaced them with stainless steel in their original location, then attached aluminum “tie-in” plates to them in order to have a surface for the side panels to rivet back to.
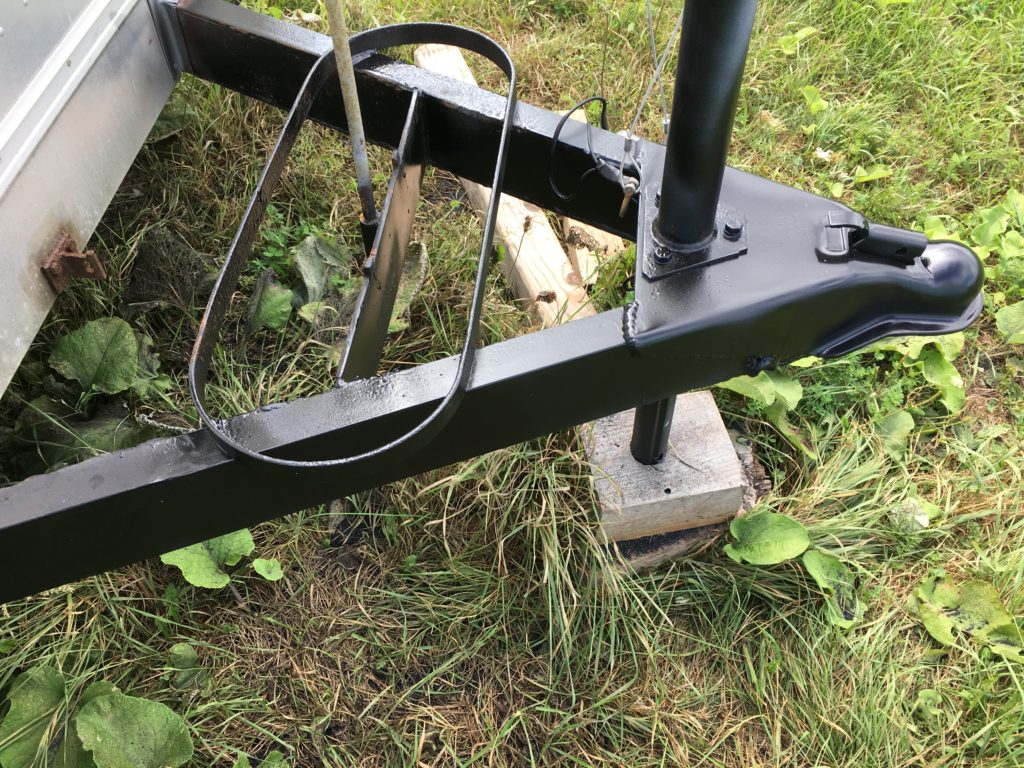
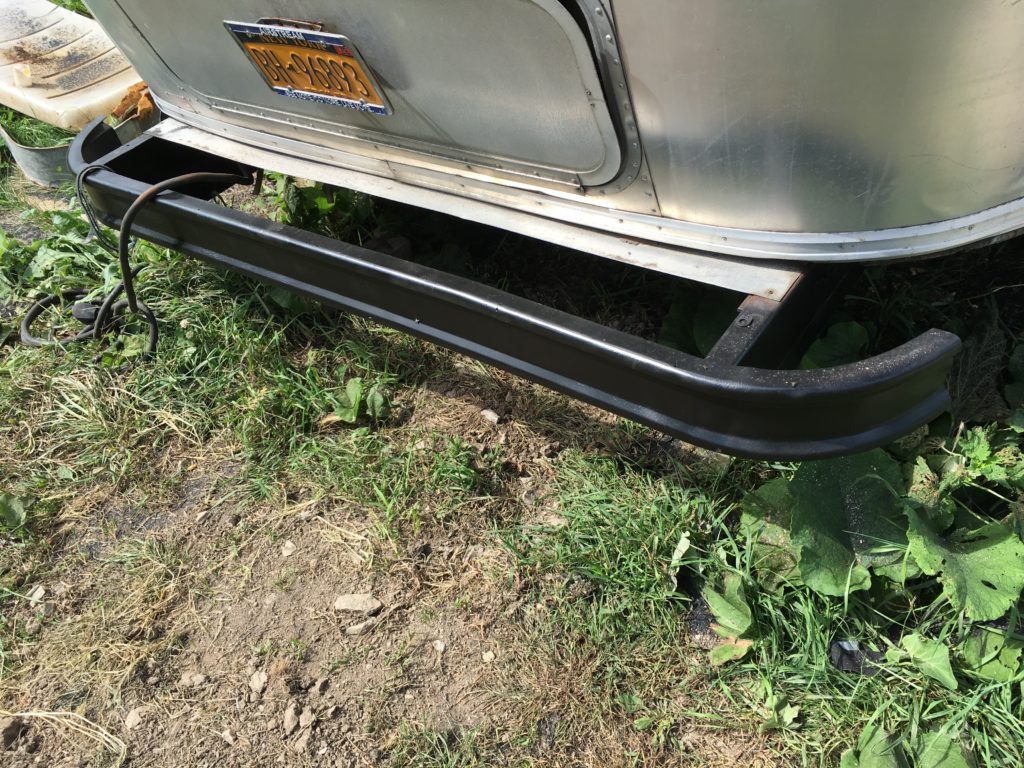
Finally, the entire chassis – including the A-frame, stair and rear bumper – was coated with POR15 rust-preventative paint, primed and painted:

At a cost of over $3,000.00 for materials and labor, this is the most expensive change order that I’d chosen to take on so far, but I felt it was a very important one. Having first discovered that the chassis was in dangerously poor condition in certain areas only after I’d started the renovation, and also having found a contractor that I trusted and could afford, it was important to strike while the iron (or in this case, steel) was hot.
Next, we’d turn our attention to the trailer’s electrical, plumbing & propane systems.
Up Next: Updating a Vintage Airstream electrical system
Visit the Little Green Airstream’s Facebook page for more photos of the renovation in action!


