
Probably the most famous element of the Airstream’s construction is the riveted aluminum paneling, originally inspired by aircraft design. Airstream’s motto, “live riveted,” equates these little fasteners with the trailer brand and the lifestyle of their owners. I’d learned through the Vintage Airstream Podcast and Airstream Life magazine that there are three different types of rivets that are typically used in Airstream construction, the most prominent of which is probably the “buck” rivet – this is the type you see holding the exterior panels to the frame. I was surprised to discover that it requires two people to install these rivets.
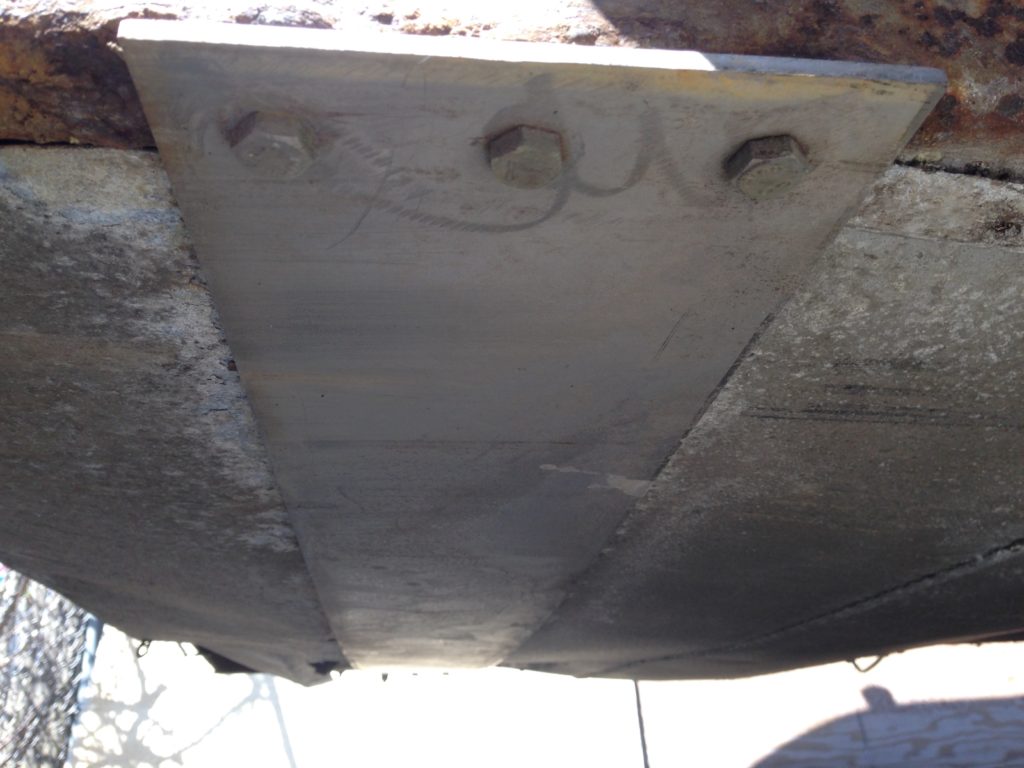
I mention all of this in a blog about belly pan removal because I’d initially thought that I wouldn’t be able to do this job myself. I was a little bit intimidated by the whole riveting process, and even the thought of removing them left me concerned that I’d disassemble something I wouldn’t have the tools or know how to put back together. However, when I went to a welder recently to repair the A-frame at the front of the trailer, we ended up removing one or two of the front belly pan panels together, so I got a hands-on crash course on how to do the work.
So to begin, here’s my first video blog (or vlog) showing the work ahead:
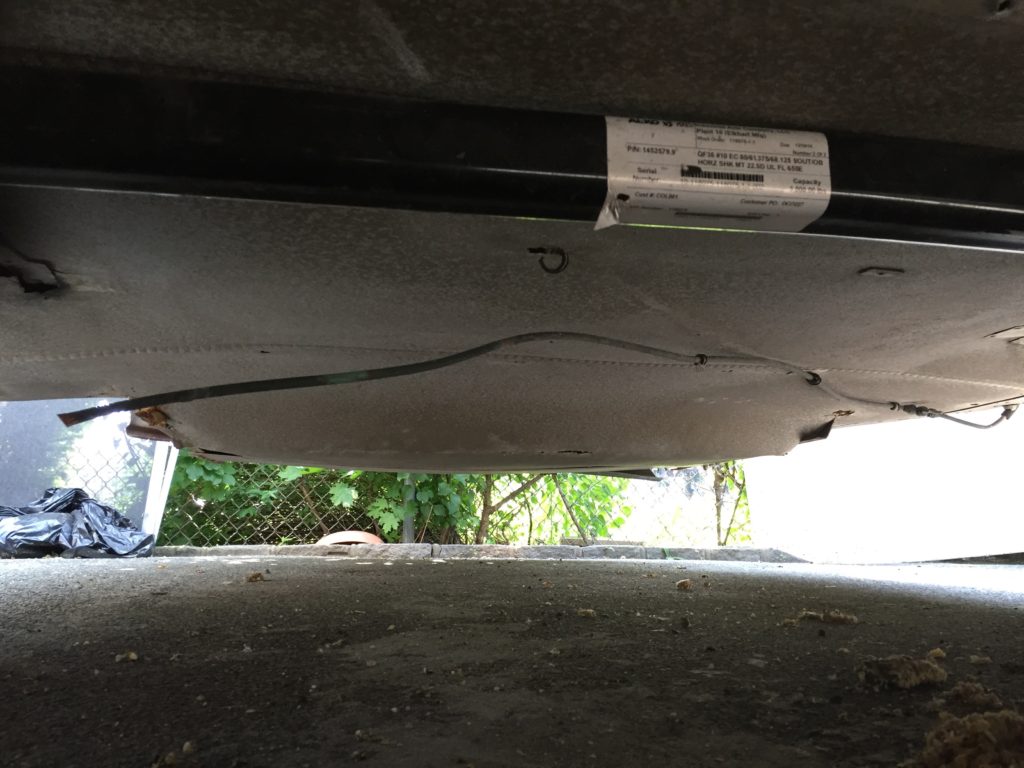
First of all, what is the belly pan?
The belly pan is a series of metal sheets on the underside of the trailer, riveted to the frame. It protects the bottom of the trailer. According to the Vintage Airstream website, it also prevents rodents from entering and reduces wind resistance while traveling.
So, why remove the belly pan in the first place?
- To further assess chassis condition & perform additional (minor) repairs
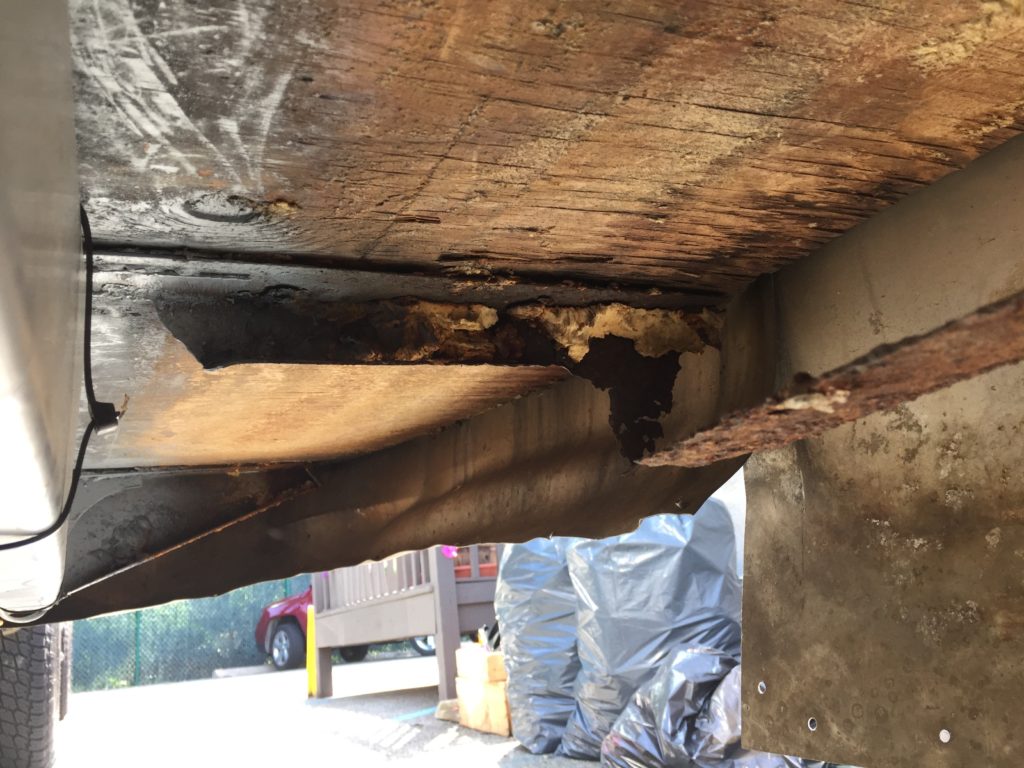
At first, I needed to remove the front two panels underneath the trailer because the welder suspected that parts of the frame near the front of the trailer had rusted away to a dangerous degree – turns out he was right. Once we were done with that repair, the belly was left partially exposed. It seemed to me that I should remove the remaining panels because a) I now knew how to do it, b) I had the time, c) it would save me a couple of thousand dollars, and d) I wanted to know if there were any other welding repairs I should get done before hitting the road.
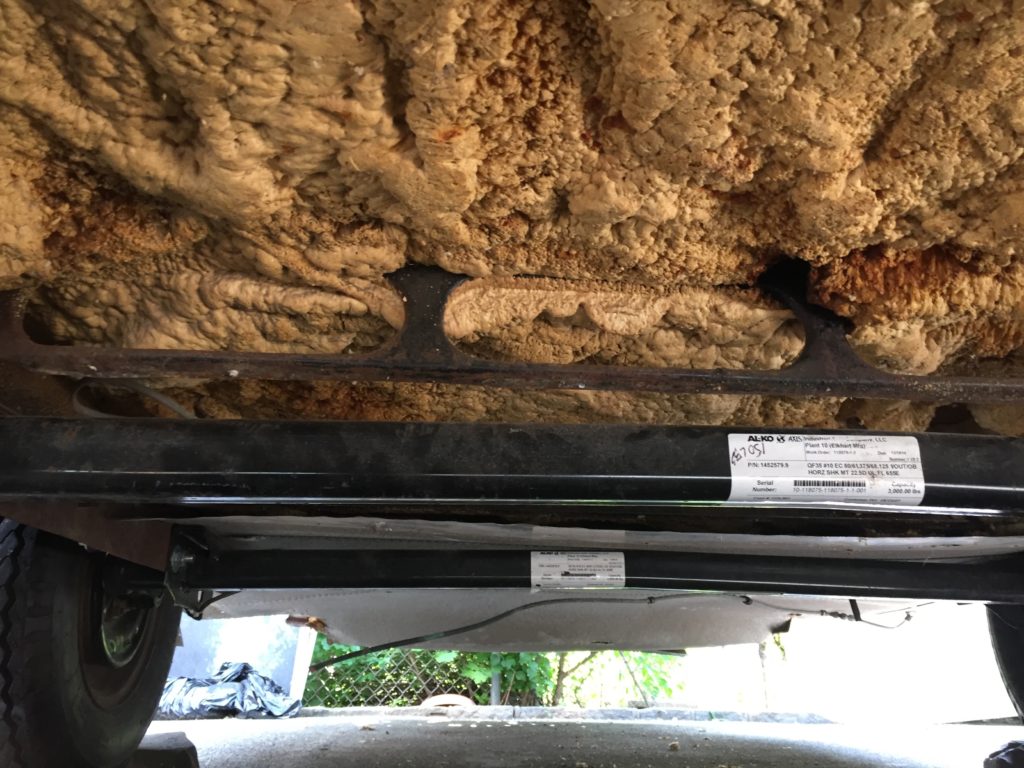
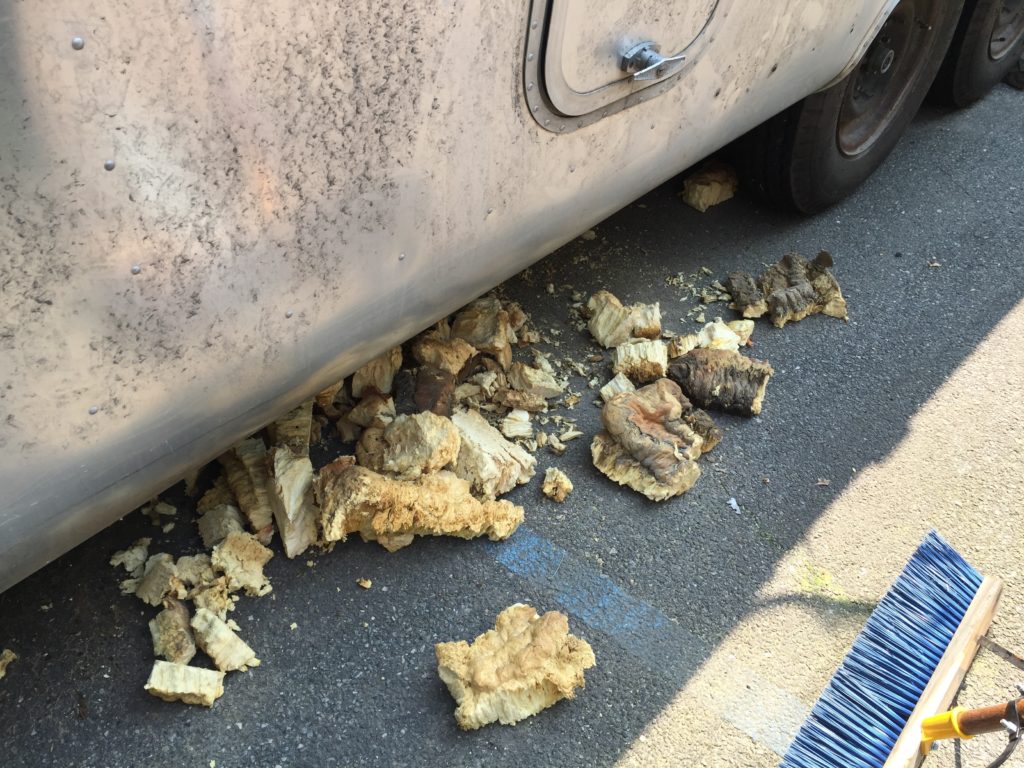
- To remove insulation that rusts frame / chassis
When my trailer was originally manufactured, they applied spray foam insulation to the sub-floor underneath the trailer and then put the belly pan on to close everything up. Unfortunately, the foam acted like a sponge when water found its way through the seams in the exterior trailer paneling and then held this moisture against the steel chassis, causing rust. In order to prevent further damage and allow access to the frame, this foam would need to go.
- Assess / remedy possible rodent access points
Apparently, mice can get through a hole the diameter of a dime, and when I was first cleaning out the trailer there was ample evidence that – even with the belly pan on – mice had found their way in over the years. Pro restorer Colin Hyde had mentioned to me that removing the belly pan exposed some areas where they typically enter the trailer, allowing you to close them up or otherwise take preventative measures. He’d also told me it was fine to leave the panels off in the short term – in my case, until it’s time for a shell-off restoration – so I didn’t have to worry about putting them back on again.
When I was first seeking out pricing to do all of this work, I was told it would take two men two days, costing me roughly $2,400. I was really excited to be able to do this work by myself, first because I was learning a new skill and becoming more confident about working with the exterior of my trailer, secondly because it would give me a good snapshot of my trailer’s condition, and lastly because $2,400 is a great savings! The work itself was fairly straightforward, but because you’re working in a tight space, lying on your back, possibly jacking up the trailer, I’d consider this a job that requires an intermediate level of skill.
[A note on safety: I did not jack up the trailer and am not advising one way or the other that you should do so. Always use personal protective equipment (PPE) such as gloves, proper eye protection and a very good dust mask.]
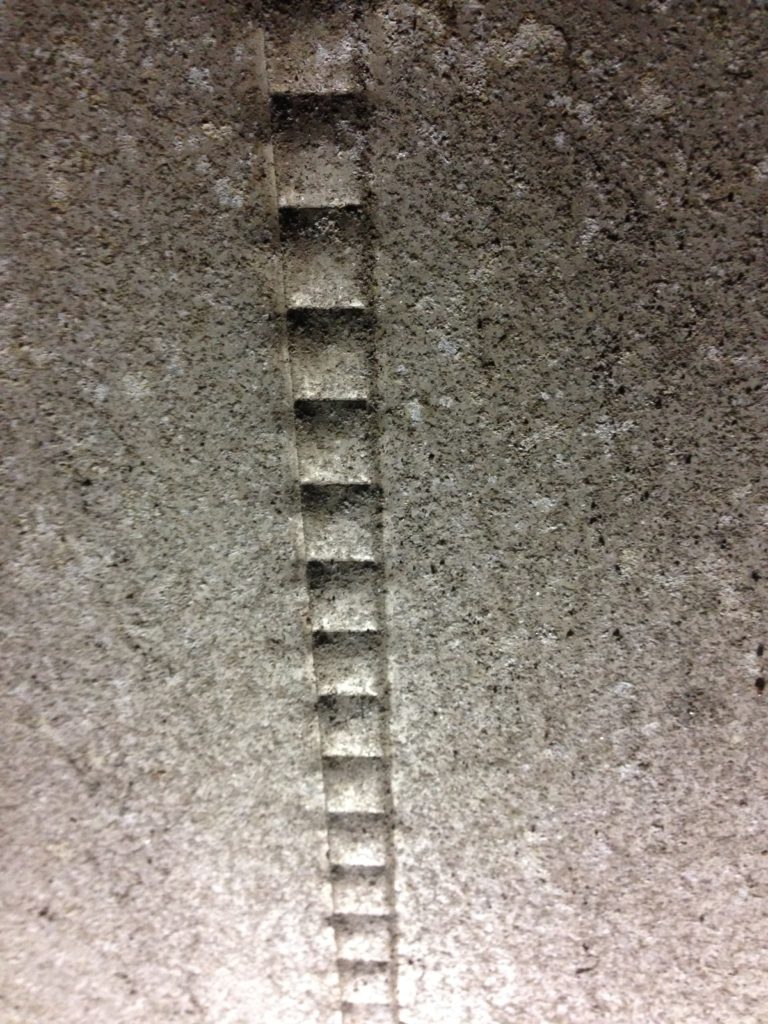
The belly pan is a series of metal sheets, and they’re attached to each other at seams that are folded & crimped together. I found it easy to detach them from one another by hammering a “beater” chisel all along the seam and prying it open. Then I would remove all of the rivets attaching each sheet to the body of the trailer using a drill and a 1/8″ drill bit, then wiggle the sheet free. There are places where propane pipes and brake lines pass through holes in the belly pan, and you have to be careful to cut the pipes (assuming you’re replacing them like I am) or cut around brake lines so that they don’t get damaged.
In the end, I found the estimate of 4 workdays for a single person to be an reasonably accurate assessment of how long the work takes. I ended up taking about 10-12 large contractor bags of polyurethane spray foam to landfill, which for a green building project is not a happy result. However, in the interest of preserving the trailer itself and extending its lifespan for the next 50 years, it was the right thing to do. The discarded belly panels and copper propane piping I’ll bring to a scrap yard and see if they’ll take them and perhaps earn a little money.
Removing the belly pan exposed most of the chassis to the naked eye, telling a much clearer story of the trailer’s condition. I now have the ability to have certain things repaired the next time I go to a welder. Also, speaking to my initial fear of removing rivets and not knowing how to repair my work, certain body panels that run up the side of the trailer become detached from the chassis when you remove the belly pan. Although these panels are still firmly fixed to the trailer, the lower parts of these panels will flap freely as I drive until I re-attach them somehow to the bottom of the trailer again. I’d like to fix these before I drive cross country because I don’t want these panels to be stressed or warp.
Rust damage to the chassis was fairly substantial in certain areas, notably at the very front and rear of the trailer. When I took off the last belly panel, an entire framing member that had previously supported the water tank fell to the ground:
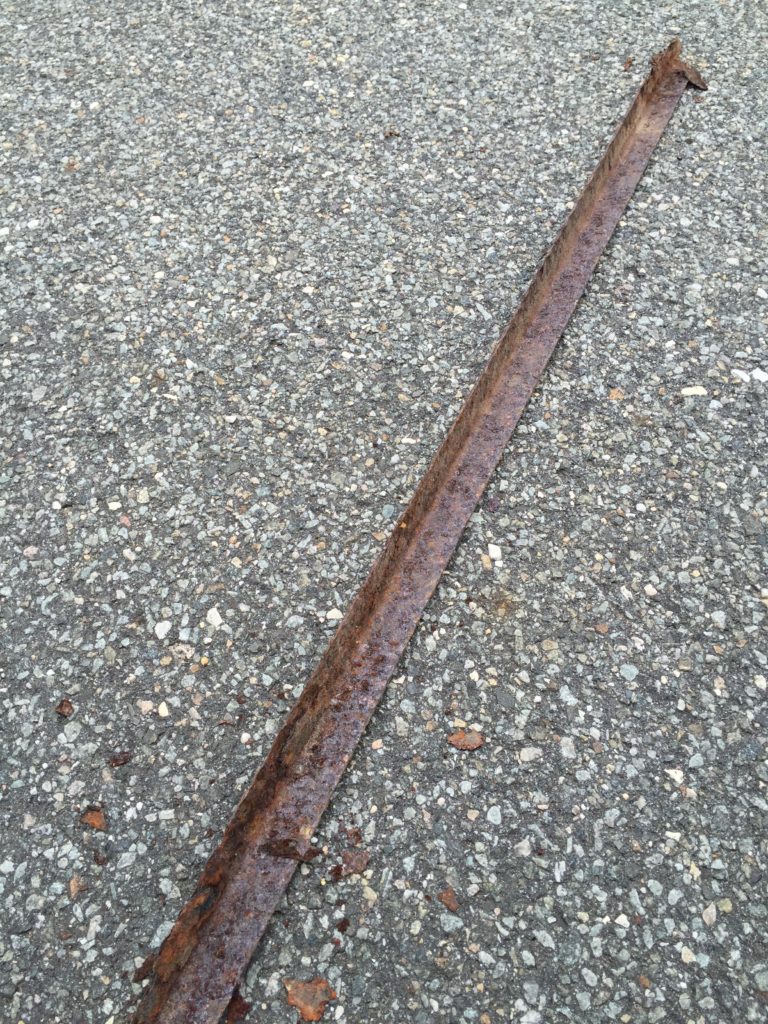
Towards the front of the trailer, one of the outriggers had rusted away almost completely and will need to be replaced:
My next step with this task will be to bring the trailer to a welder to see what he can do to replace any important framing members underneath the trailer. In the meantime, the last remnants of the foam still need to be removed and I’ll call the scrap yard to see what they can do about recycling the discarded metal.
UPDATE 6/10/16: I accidentally detached one of the wire connections to the trailer’s brakes while removing the belly pan. I found out when I went to a trailer shop today to troubleshoot a new brake controller I had bought that wasn’t registering that I was attached to the trailer. The shop (Tent & Trailer City in Hempstead, NY) diagnosed and fixed the problem within an hour for a reasonable price.
Up Next: Ordering & dry-fitting custom curtains


Bravo, James! I have enjoyed reading about, and watching your Airstream renovation adventures! You’re very brave to have taken out all those rivets! That would have freaked me out!! Good luck with any other repairs you are planning on doing!
Love,
Aunt Marguerite
Thanks Aunt Marguerite!