
One of the key benefits of working with my new contractors, Paul & Éamon McMahon, is that both of them are very capable and have been available to work on the trailer in their spare time. So, to some degree I’ve been able to take advantage of their combined experience simultaneously. While Éamon was working to repair the chassis of my ’69 Airstream, Paul went to work updating my electrical system.
I have a healthy respect for the trades in general, but certain types of work make me pay special attention for safety reasons. Electrical is one of them. I took a couple of basic electrical courses when in school at Yestermorrow that made me feel much more confident about doing home repair work. However, troubleshooting a nearly 50-year-old system in a travel trailer seemed like something I should leave to the experts, primarily because it would save time. To start with, though, I needed to get a grasp of how much work needed to be done, so I could figure out my costs.
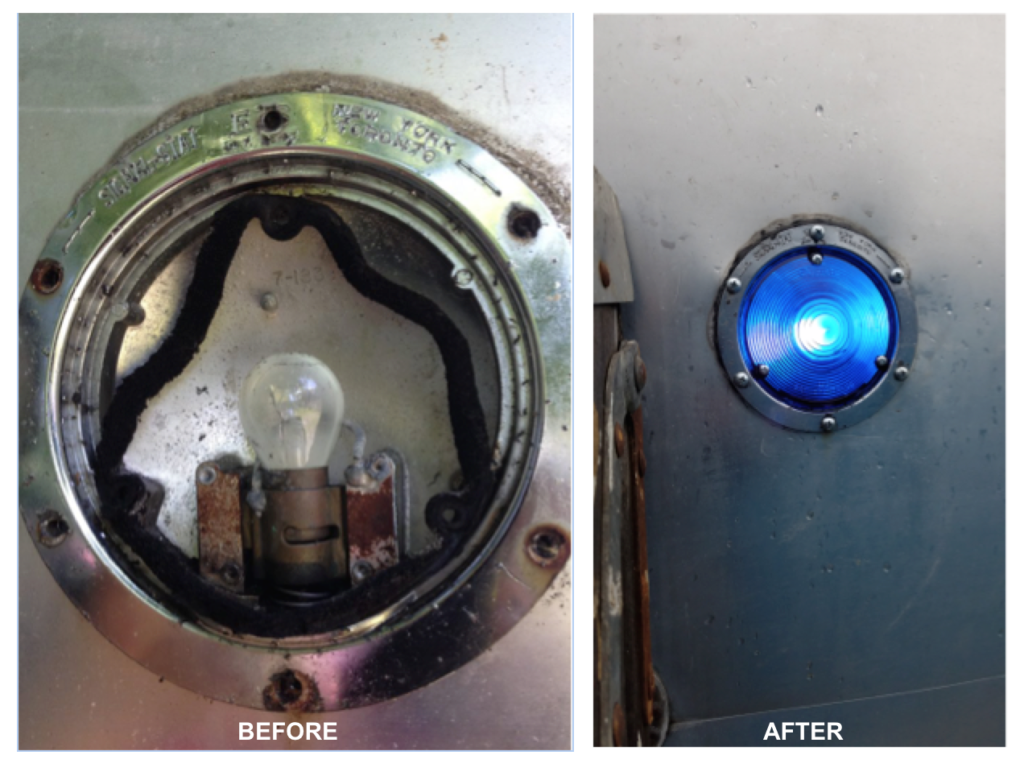
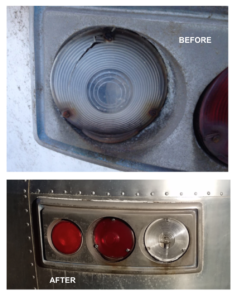
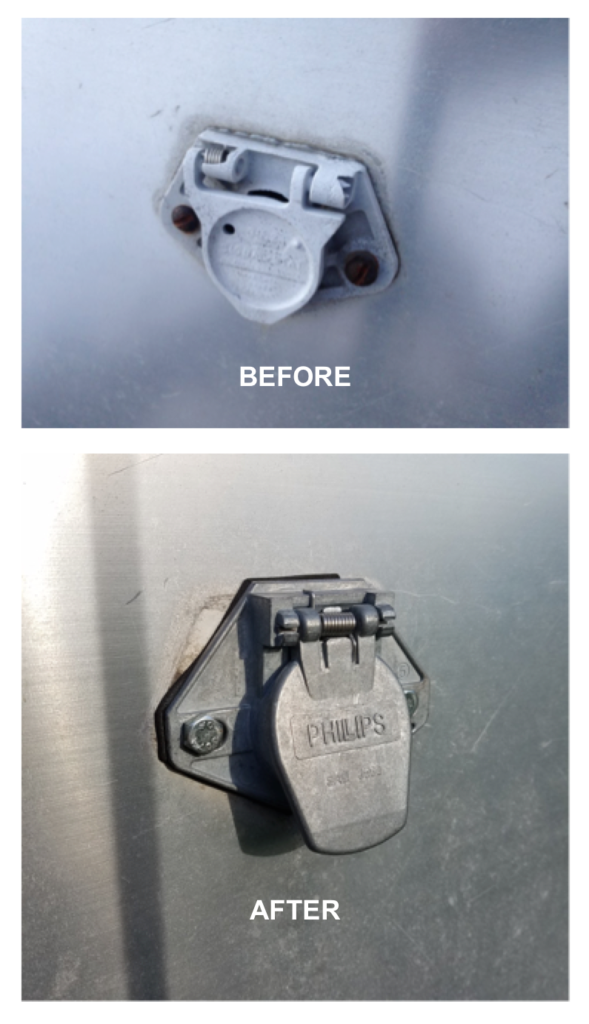
My preliminary research and a conversation with a professional Airstream restorer had given me the understanding that right off the bat, I’d need to replace the Univolt converter and 12-volt fuse box that were originally installed on the trailer. I was advised that the Univolt would be junk – noisy and otherwise inefficient this many years later. I knew that I could also expect to replace the battery. Then, the first Spring after I’d purchased the trailer, I’d walked all around and through the trailer, looking for any overt repairs I’d need to do, and noticed that the several lights and the 7-pin connector needed work. There was evidence that a previous owner had done significant electrical repairs on his or her own, possibly complicating matters. And when I took the trailer into the shop for routine maintenance to get it road-ready, technicians were able to check and repair the running lights on the exterior of the trailer to make it safer and more visible on the road.
By the time I’d done all of that (and had a couple of preliminary conversations with the McMahons), felt that I had a fairly decent grasp of my electrical scope:
- To replace my original converter with a new Progressive Dynamics Inteli-Power PD9260 60-amp Converter and Battery Charger
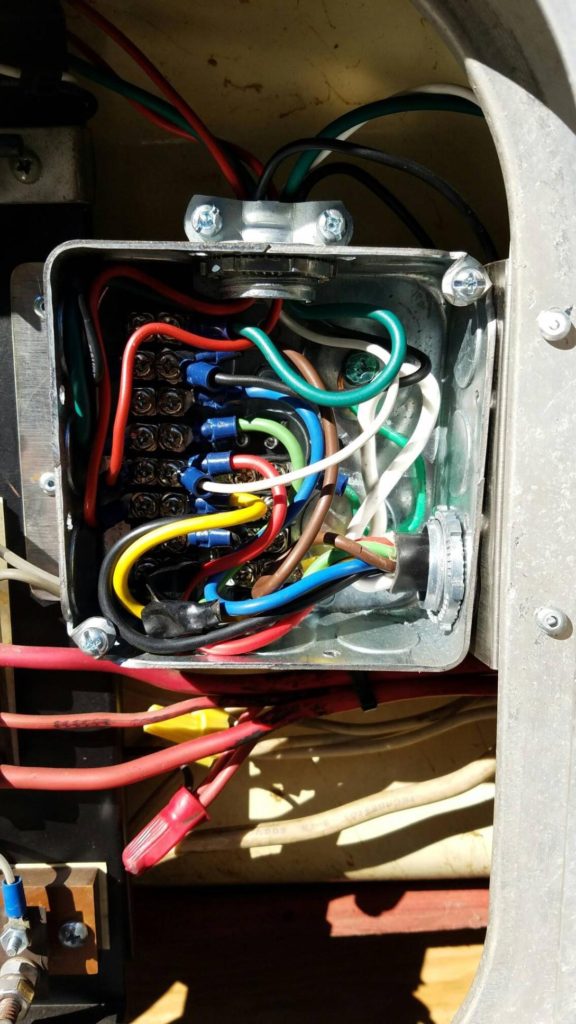
- To replace my 12-volt Fuse Box
- To install a new RV Battery
- To replace my original 7-pin connector with a new one that has metal housing and split pin bolts
- To replace light canisters at the rear signal lights (these were so rusted that the screws that hold in the light lenses didn’t have anything to attach to)
- To install new light lenses to replace ones that had cracked with age
- Identify and purchase an appropriate surge control device
- To check / restore power to interior lights, appliances, and all outlets
Some of the electronic components I was interested in installing, I was not very familiar with. For example (according to the Progressive Dynamics website), the converter is described as follows:
“Remote camping in a modern recreational vehicle requires an electric power source (i.e. a 12-volt battery system). The power converter recharges the battery and supplies 12-volt power for the lights and appliances when 120–volt AC power is available. Most RV manufacturers now specify electronic power converter/chargers.”

I was told I’d need to have a 12-volt fuse box installed with my new converter, too. According to website AllAboutCircuits.com, fuses are “…nothing more than a short length of wire designed to melt and separate in the event of excessive current. Fuses are always connected in series with the component(s) to be protected from overcurrent, so that when the fuse blows (opens) it will open the entire circuit and stop current through the component(s).”
Both Vintage Airstream Supply (where I purchased the item) and pro restorer Colin Hyde had recommended a new fuse box with the installation of my new converter because,
“[A new 12-volt fuse box panel is] ideal [when] replacing a converter that contains an internal fuse panel (like older Univolts) with a converter/charger that does not (like modern Inteli-Power Converters).”
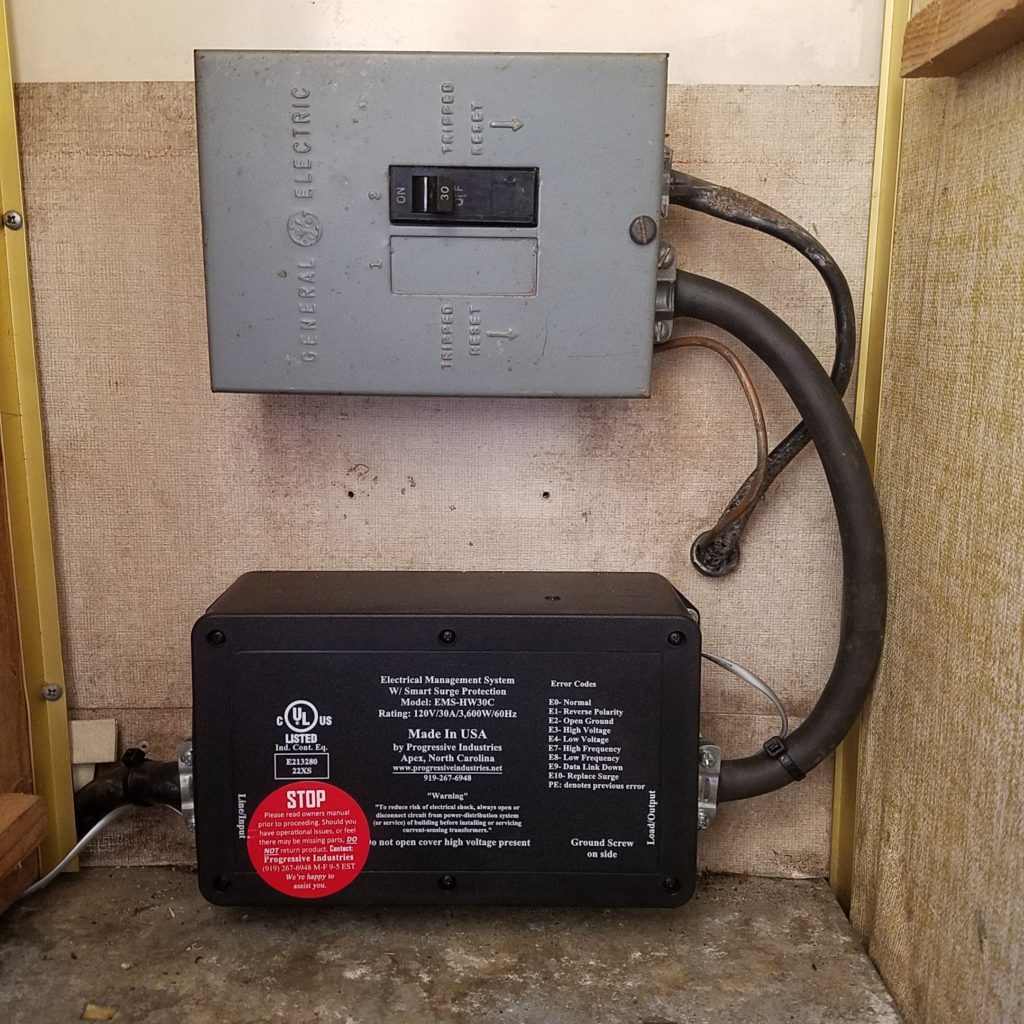
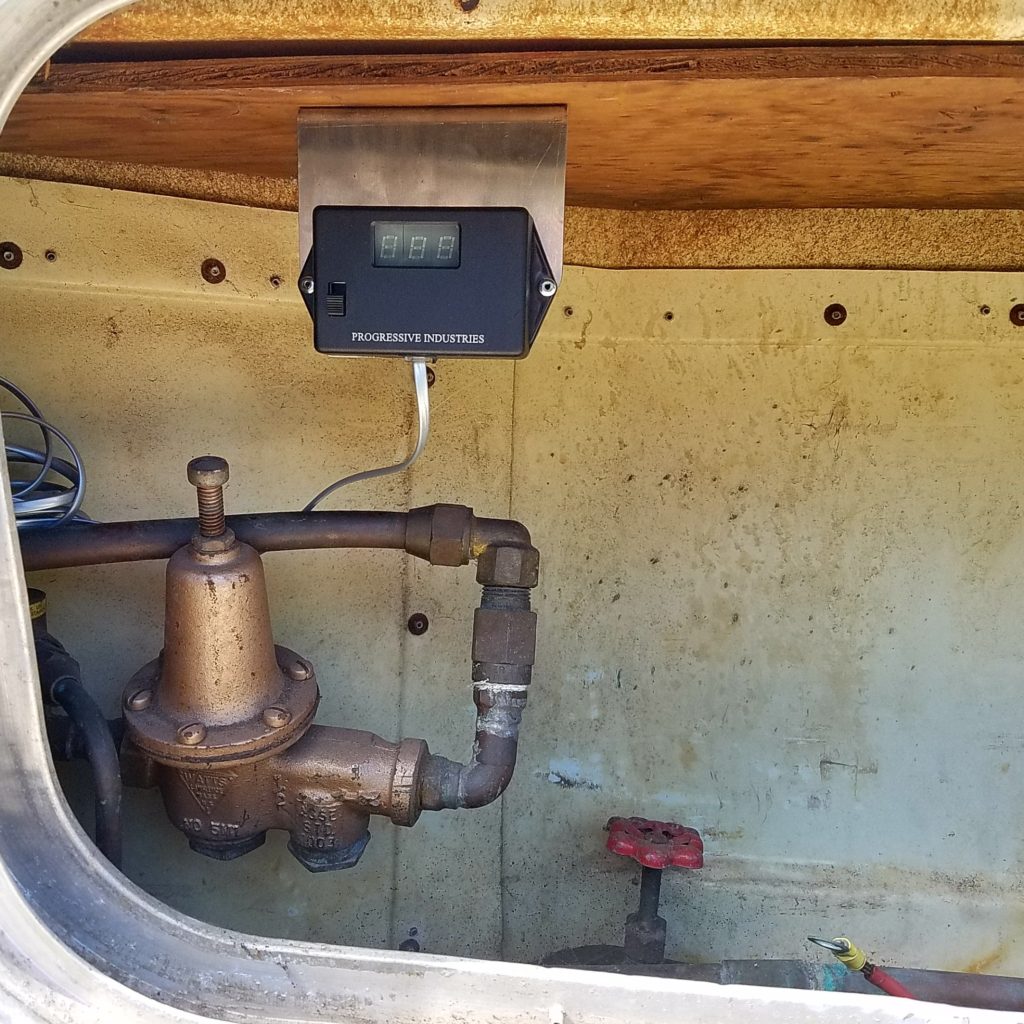
Another item I was interested in purchasing was a surge controller. Although anybody who’s ever bought a power strip for their home or office knows what surge protection is, I gradually learned from reading posts on Airstream Forums that RV parks often have very inconsistent or unpredictable power sources, so it’s important to have some type of surge controller that connects to your power supply when you plug in. I was originally looking at models that attach to the end of the AC plug. This style was not cheap and was easy to steal when left unattended, so before pulling the trigger on it I asked Paul for his thoughts.
Paul ended up recommending the Progressive Industries’ Hardwired Electrical Management System (EMS), which we agreed was a better option because a) it was cheaper than the product I was looking at (not including labor), b) it could be installed inside the trailer and prevent theft, and c) came with a remote digital display so that one could easily read the status of the electrical supply from a convenient location.
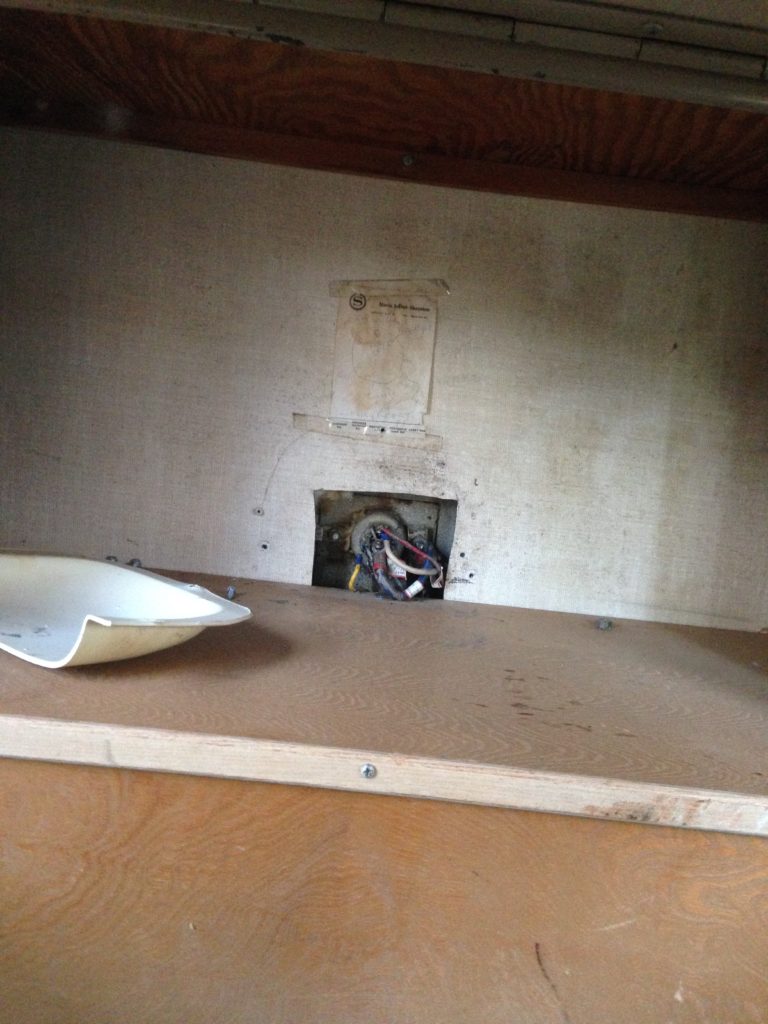
Some of the parts (like the converter and fuse box) I’d brought with me when I left the trailer with my contractors. While we were waiting for others I’d ordered to arrive, Paul started a general inspection to check how the interior lights, outlets, appliances, vents – everything powered by electricity – were working. During the course of this inspection, he found that a couple of interior lights needed new switches and that the bathroom vent fan was not working properly.
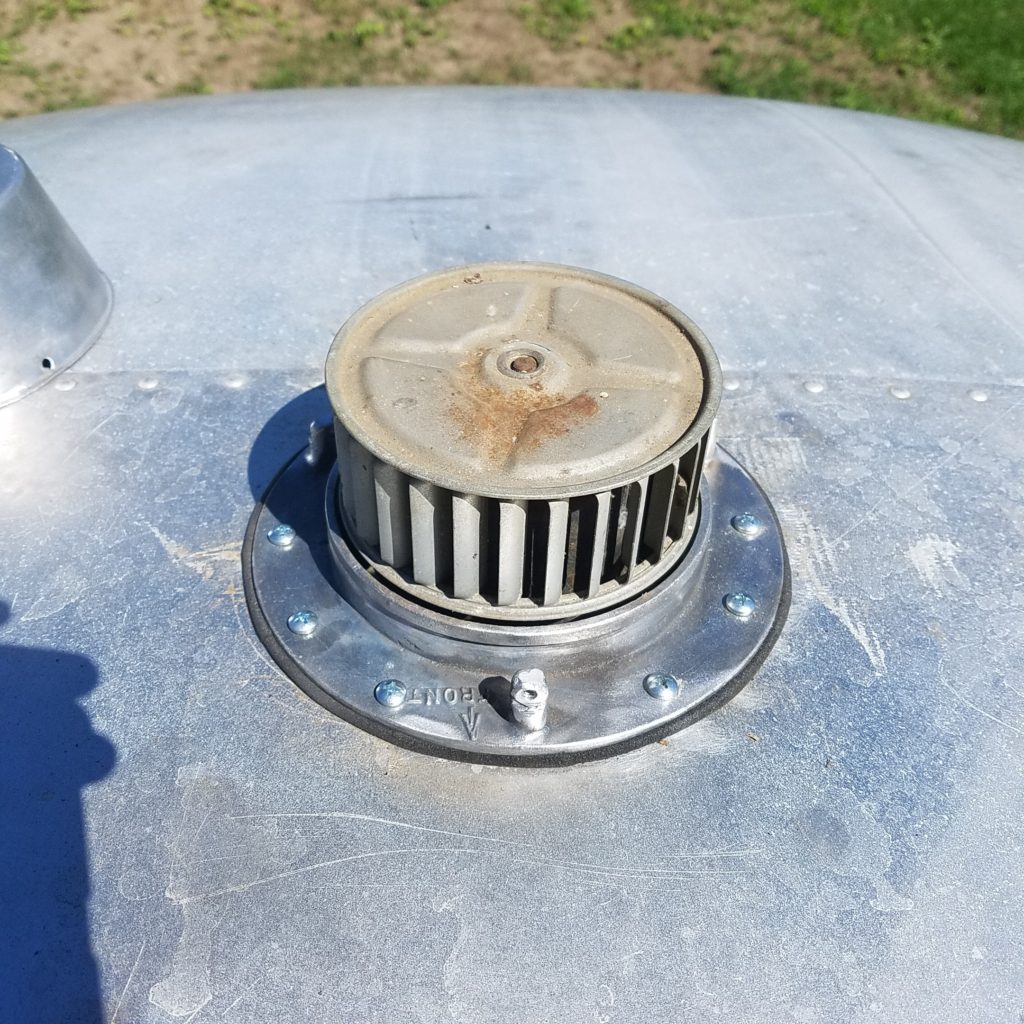
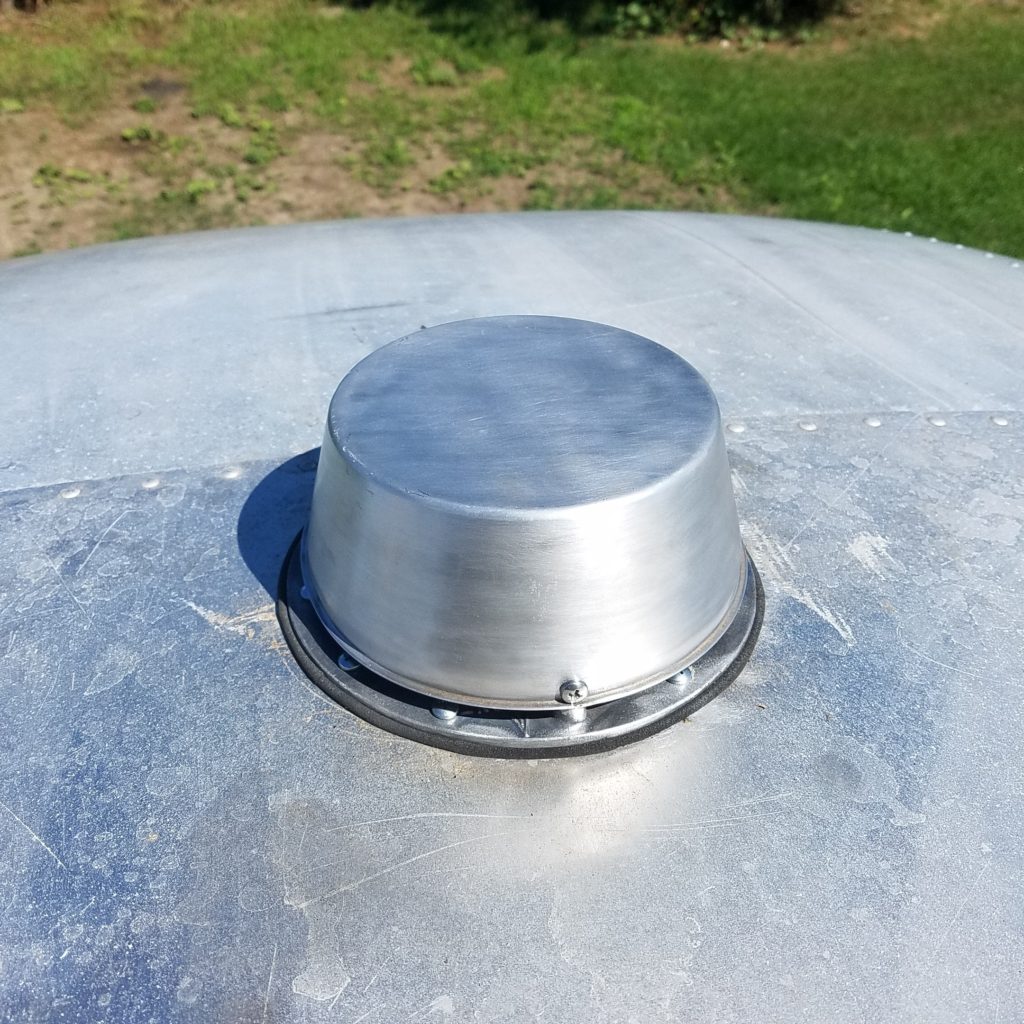
I had removed the bathroom vent fan from my 1969 Airstream Safari parts trailer just after it crashed and I stripped it for parts, and shipped it to Paul. Using parts from the two vent fans, Paul took it upon himself to troubleshoot the motor, replace a valve & gasket, repair broken hardware, then clean, paint, reinstall and test the fan. This was not an inexpensive change order, but I could trust it would work like new.
The surge controller with remote went in quickly, as did a new, high-quality RV battery, and the assessment of the interior and exterior lights & outlets was fairly straightforward as well. Aside from the turn signal light canisters and lenses, a couple of switches used to turn on interior lights needed replacement. All of the outlets and appliances seemed to be getting power and were operational (or close to it), with one notable exception – the refrigerator. It was getting power but still wasn’t working. My contractors decided that the high concentration of ammonia in the unit made it potentially dangerous for them to work on, and I’d have to find another solution to get it working again.
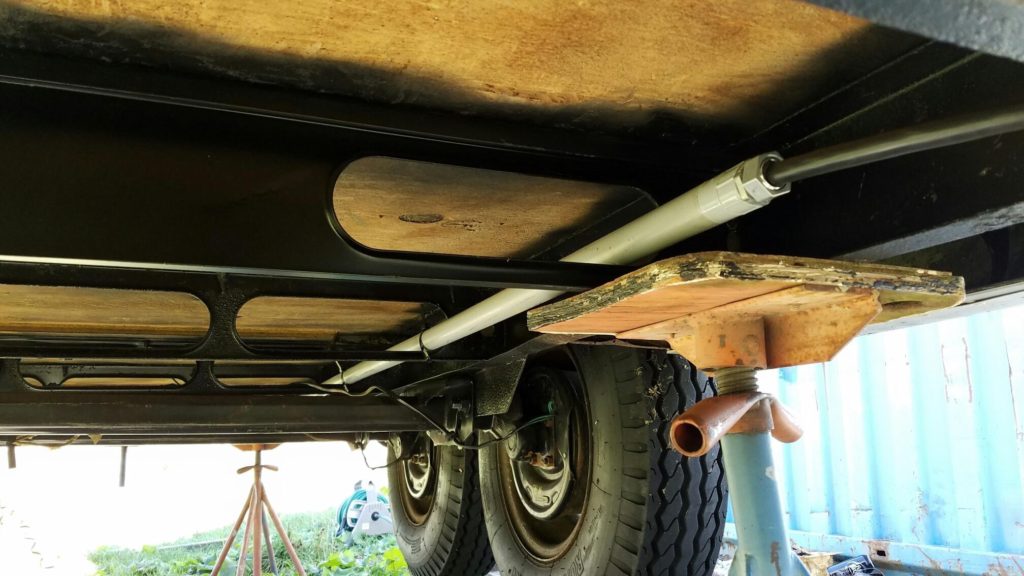
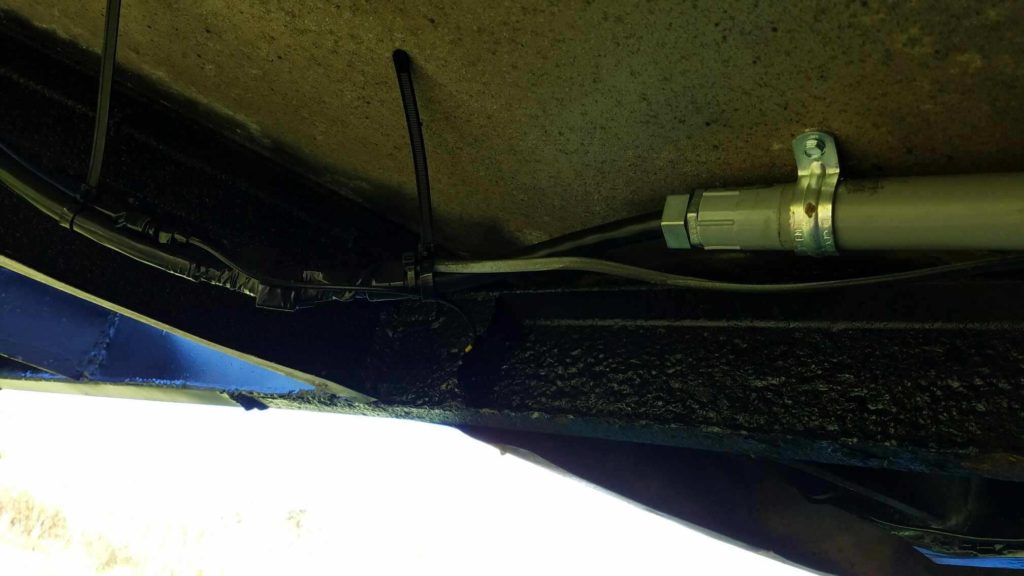
Another significant issue that became more apparent during the process of testing the electrical system was the wiring work that a previous owner had done. Paul was finding that he was spending an inordinate amount of time figuring out the wiring, particularly as it related to the 7-pin connection that led from the front of the trailer, along the interior of the trailer’s walls, and to the rear compartment where the fuse box and battery are housed. I was being billed for the extra time he was spending trying to troubleshoot an amateur’s electrical work. So, he proposed that we take the opportunity to update the wiring, running it underneath the trailer through pipes rather than through the walls. This would make the wiring more accessible in the event that a repair was needed. I approved this change order as well, significant added cost though it was, because it essentially meant the electrical system would be much easier to understand and work with moving forward, and replaced old, inaccessible wiring in the walls that likely had been chewed by mice.
If this were an ordinary residential construction job, I would have approached at least one electrician in advance in order to determine my rough estimated costs up front. In this case, because Airstream restorers are hard to come by, I had to wait until I had the trailer in the right person’s hands before I could get a clear picture of the necessary repairs. In this case, it worked in my favor (despite the added cost), because I found contractors who could give me the best price for quality work that I ultimately would have wanted done anyway.
[As a side note, I’ll be listing the costs associated with my change orders in an upcoming blog post.]
There were still a few electrical odds and ends to repair, but most of the work was at this point complete. Now we could start to move on to the plumbing and propane systems to get them up and running. Systems work is sometimes “unsexy” in the sense that everyone likes the look of a finished space, admiring the interior design. The expectation is that the lights already turn on, the outlets work, water runs through the taps without leaking, and so on. But for me, updating these nearly 50-year-old systems meant that I could fully use the space, imagine myself living in it easily and with that much less concern, and the more it was becoming a viable substitute for a small studio apartment in my new city.
Up Next: How to Refinish Original Vintage Airstream Cabinetry
Visit the Little Green Airstream’s Facebook page for more photos of the renovation in action!


This continues to be an undertaking of epic proportions, and the progress you are making is nothing short of impressive. May your plans to be on the road soon be
realized!
Thank you! Getting close to hitting the road now!